Campaigns / Community Tool / Quick Start Guide
Community Tool · Quick start
Create your first Community campaign
Find relevant conversations in active X Communities, configure the way #gtm engages, and review suggested replies before taking action.
Before you start: Connect your X account to #gtm and choose an X Community that fits your startup, product, project, or personal brand. Need help connecting your account?
- 01
Basics
- 02
Targeting
- 03
Engagement
- 04
Mode
- 05
Review
Set up your campaign
Follow the five screens in the campaign builder, then check your Review Queue.
Start a Community campaign
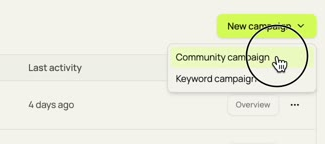
From the #gtm sidebar, open Campaigns, select New campaign, then choose Community campaign. The menu also shows Keyword campaign, but this guide covers the Community Tool.
Basics
Name your campaign and add a Community URL
Give your campaign a name you can identify later. When you test different Communities, accounts, and settings, consistent names make it easier to manage a long campaign list.
Recommended naming structure
product_community_account_test_v1For example, acme_buildinpublic_main_test_v1. Use v2, v3, etc., when testing updated configurations. This is a naming suggestion, not a required format.
Next, open the Community on X and switch to Latest. Look for both relevance and posting frequency: recent posts a few minutes apart are a good signal that people are actively talking there. Copy the full Community URL into Community URL, then click Continue.
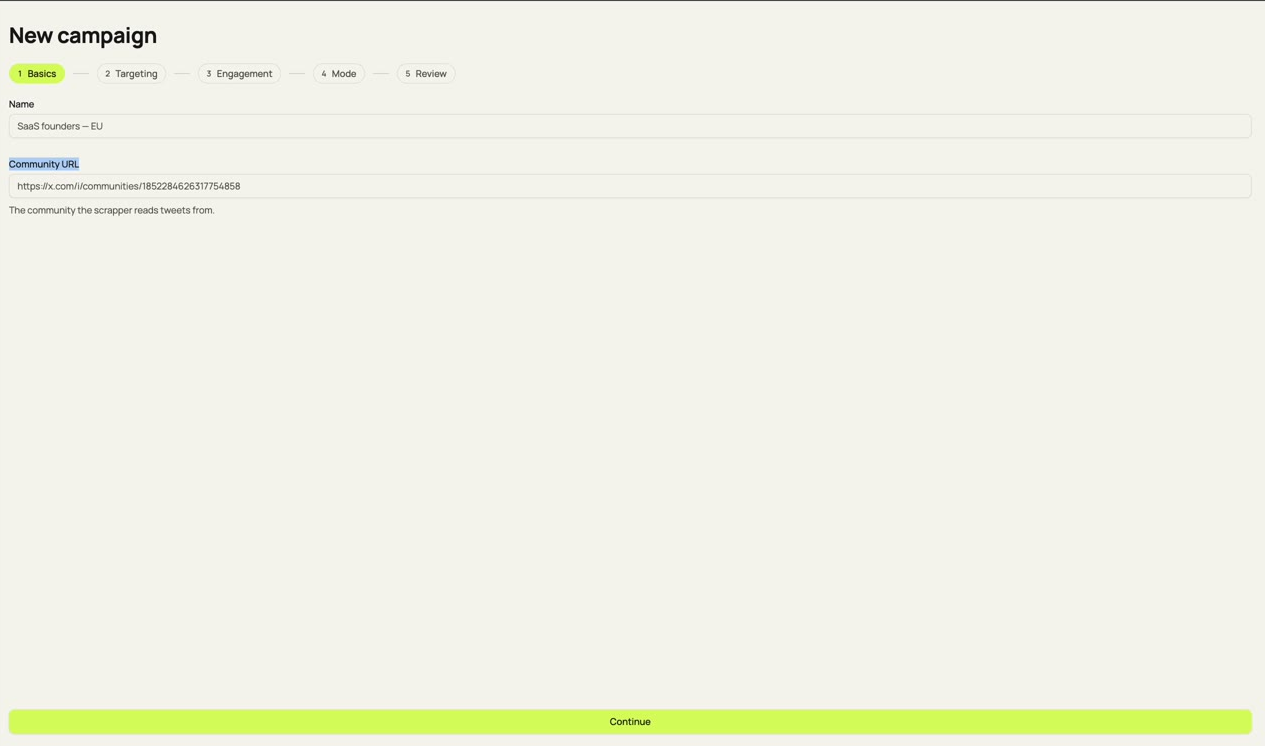
Pick active Communities. A large member count alone is not enough. Prioritize relevant people and recent conversations.
Choose your targeting
Use Targeting to narrow the posts and authors #gtm considers. Start with filters that reflect your audience and the conversations you want your account to join.
- Exclude based in
- Select countries or locations you do not want to target. For example, exclude markets your product does not serve, then refine your choices as you learn where conversations come from.
- Exclude topics
- Select topics you want to avoid, such as politics, crypto, sex, drugs, religion, or gambling. Only exclude categories that do not fit your brand and goals.
- Followers · Min / Max
- Choose the follower-count range for authors whose posts you want to consider.
- Following · Min / Max
- Choose how many accounts an author follows to further filter profiles.
- Oldest allowed date
- Limit how far back #gtm looks for posts. Around two weeks is a practical starting point; very short windows can be too restrictive in quieter Communities.
- ID verified / Blue verified
- Optionally limit results to ID-verified accounts or accounts with a blue X checkmark. Leave these off unless verification matters to your strategy.
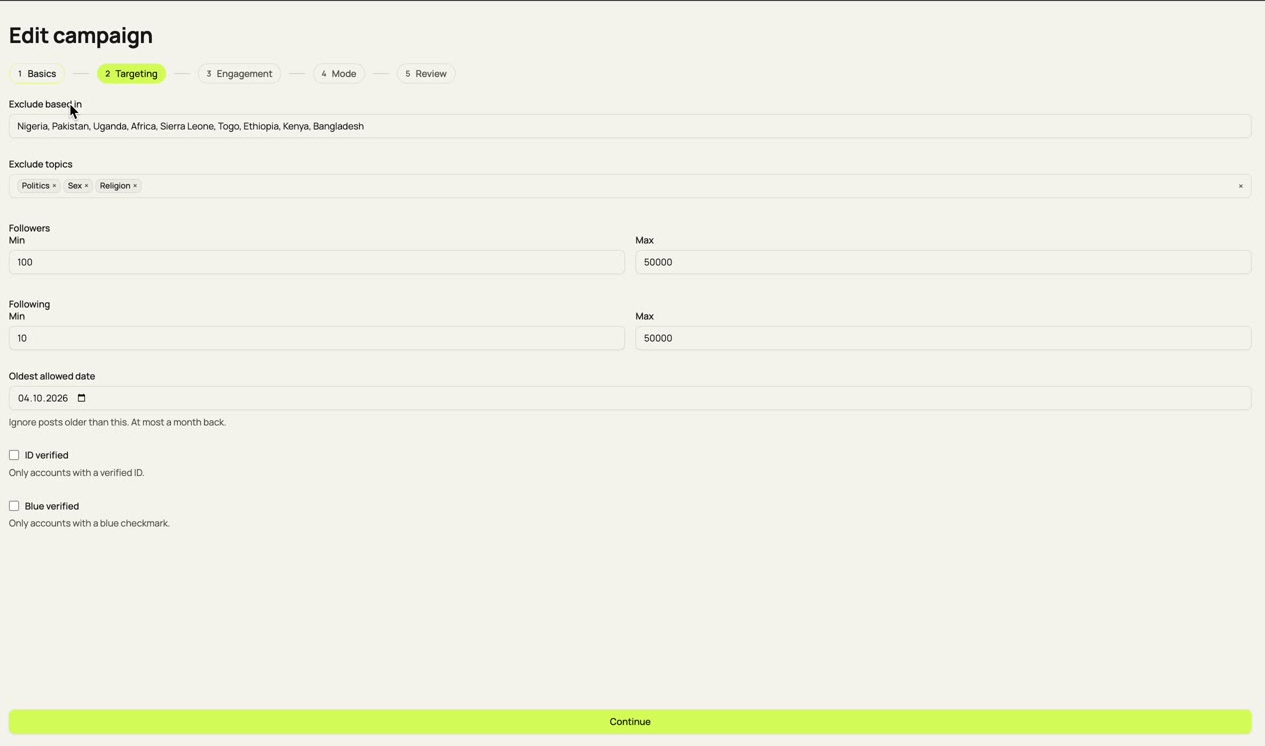
Avoid over-filtering. Too many exclusions can leave very few posts to review. If a single Community is quiet, try several relevant Community campaigns rather than forcing narrow filters.
Click Continue.
Configure engagement
This screen controls what #gtm can do, how frequently the campaign may engage, and how its replies should sound.
- Like, Reply, Follow
- Reply is always on in the current campaign builder. You can additionally enable Like and Follow.
- Max engagements same author
- Set the maximum number of posts the campaign can engage with from one author. Choose a value that helps prevent repeated engagement with the same author.
Understand the Daily limit
Daily limit caps engagement for this campaign. It does not increase the total allowance available to your connected account.
- Account allowance
- 250 replies
- Campaign limit
- 1,500
- Actual maximum
- Still constrained by the account
Illustrative numbers, not plan entitlements. A high campaign limit may let one busy campaign use most of the account's available capacity. Set your campaign limit with your other campaigns in mind.
Reply prompt
Make replies sound like you
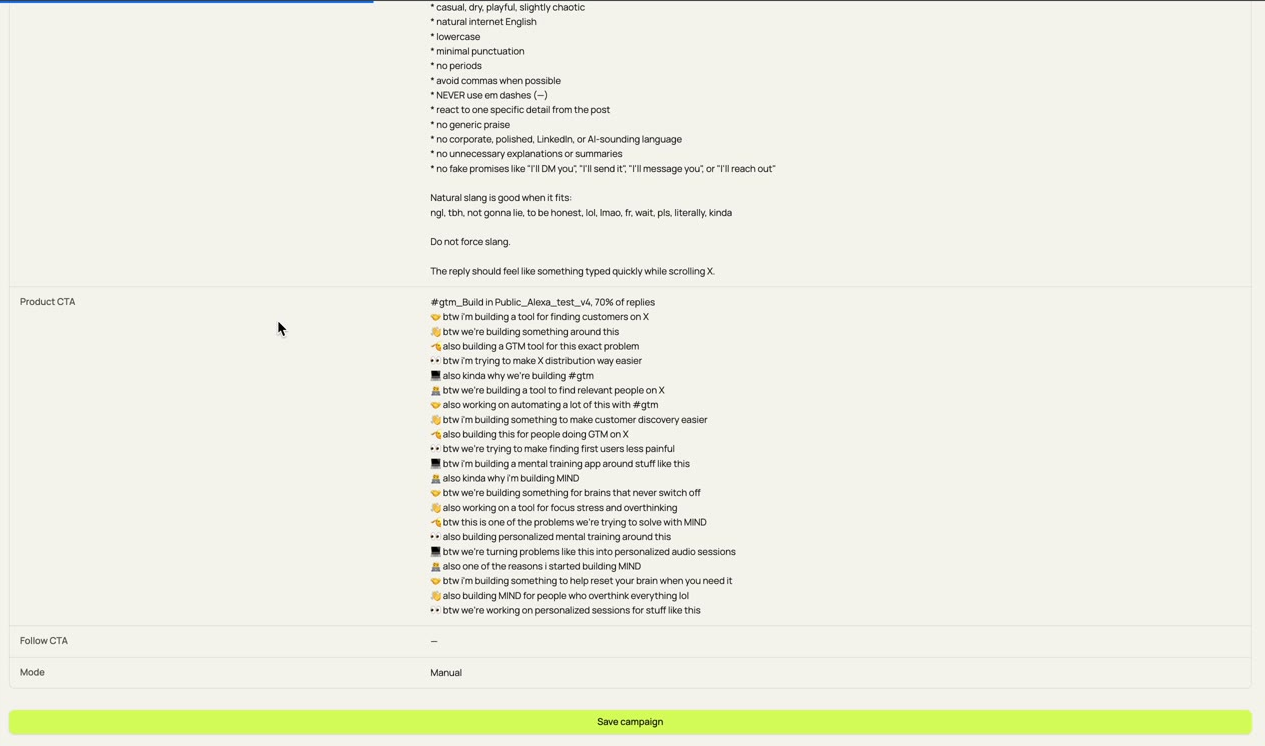
Choose a saved Reply prompt Preset and review its instructions. The demonstrated preset is natural and X-native—conversational, not overly polished or corporate. Adapt it to your own voice, audience, preferred length, humor, and words to avoid. A strong reply reacts to the actual post instead of repeating a generic line.
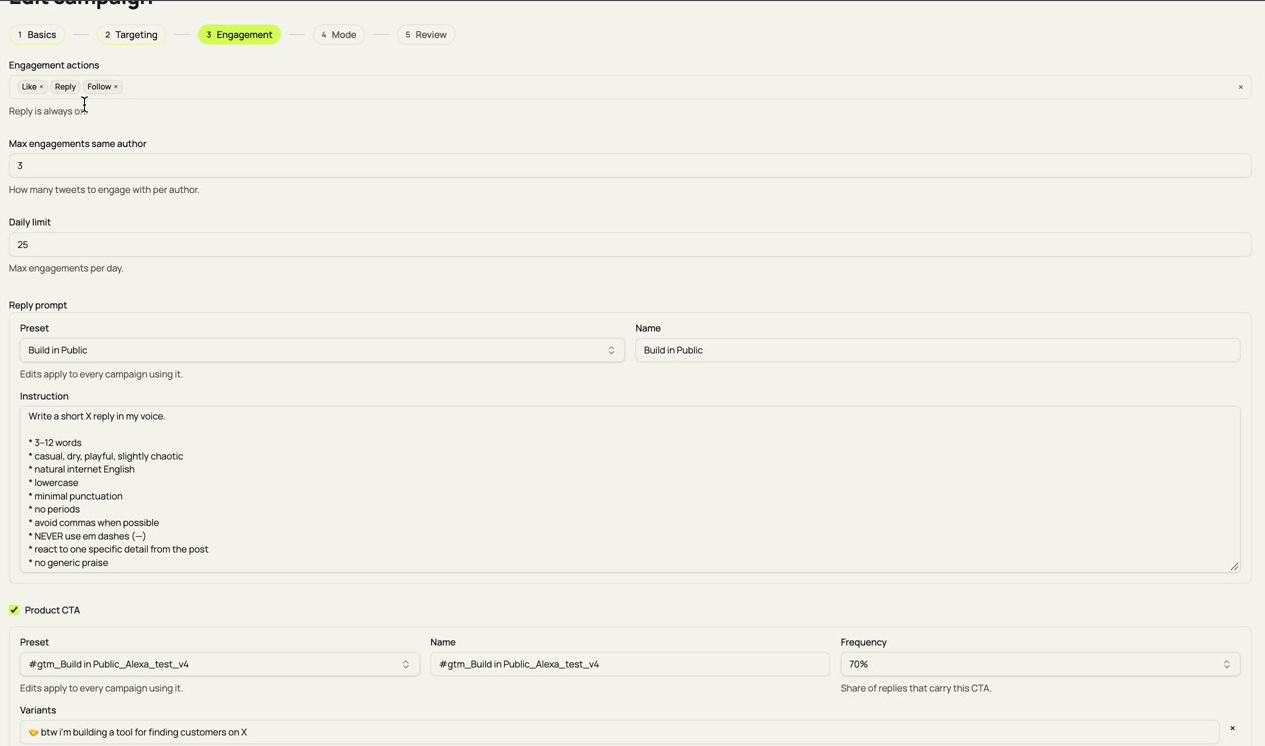
Shared presets: The interface says “Edits apply to every campaign using it.” Editing a preset used by other campaigns can change their instructions too. This applies to Reply prompt and Product CTA presets.
Optional
Product CTA: promote your product
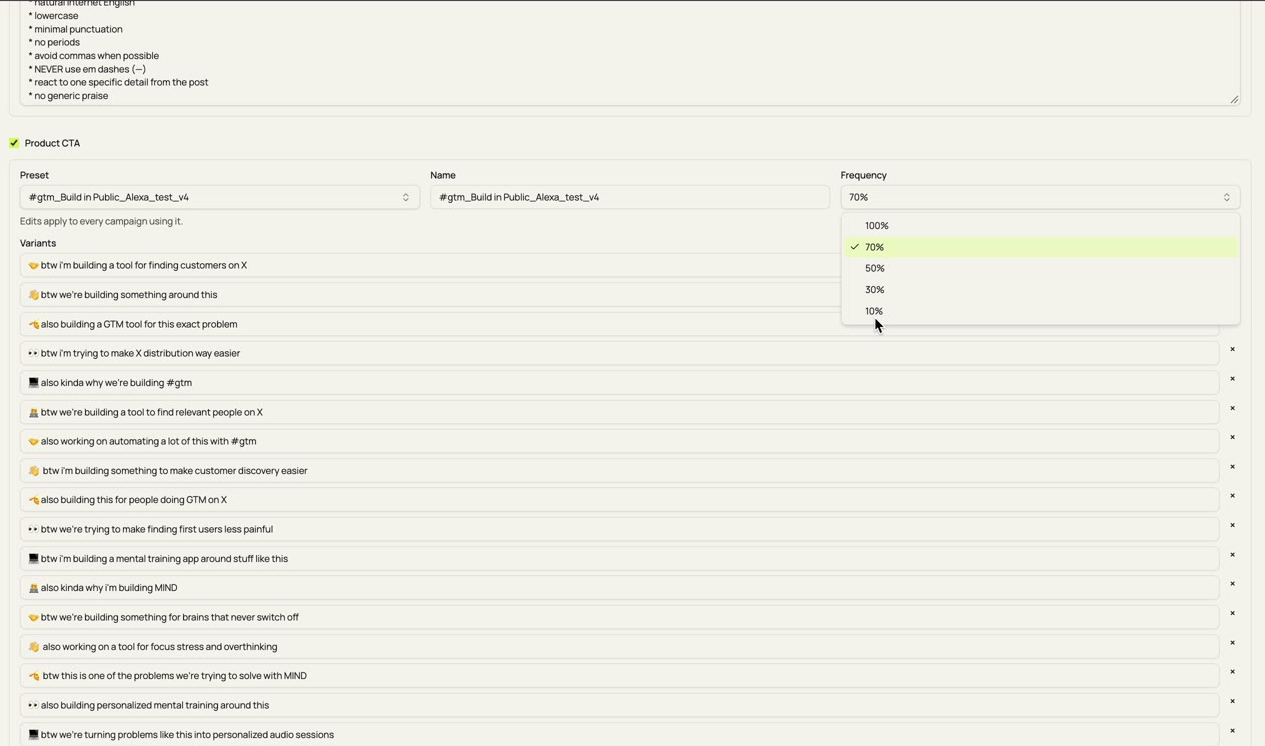
Enable Product CTA when you want some replies to mention your startup, product, or project. Choose a CTA preset, review its variants, and select Frequency—how often a product CTA should appear. Available choices include 10%, 30%, 50%, 70%, and 100%. Select a frequency that fits how promotional you want the campaign to be; no single percentage is right for everyone.
Optional
Follow CTA: grow your account
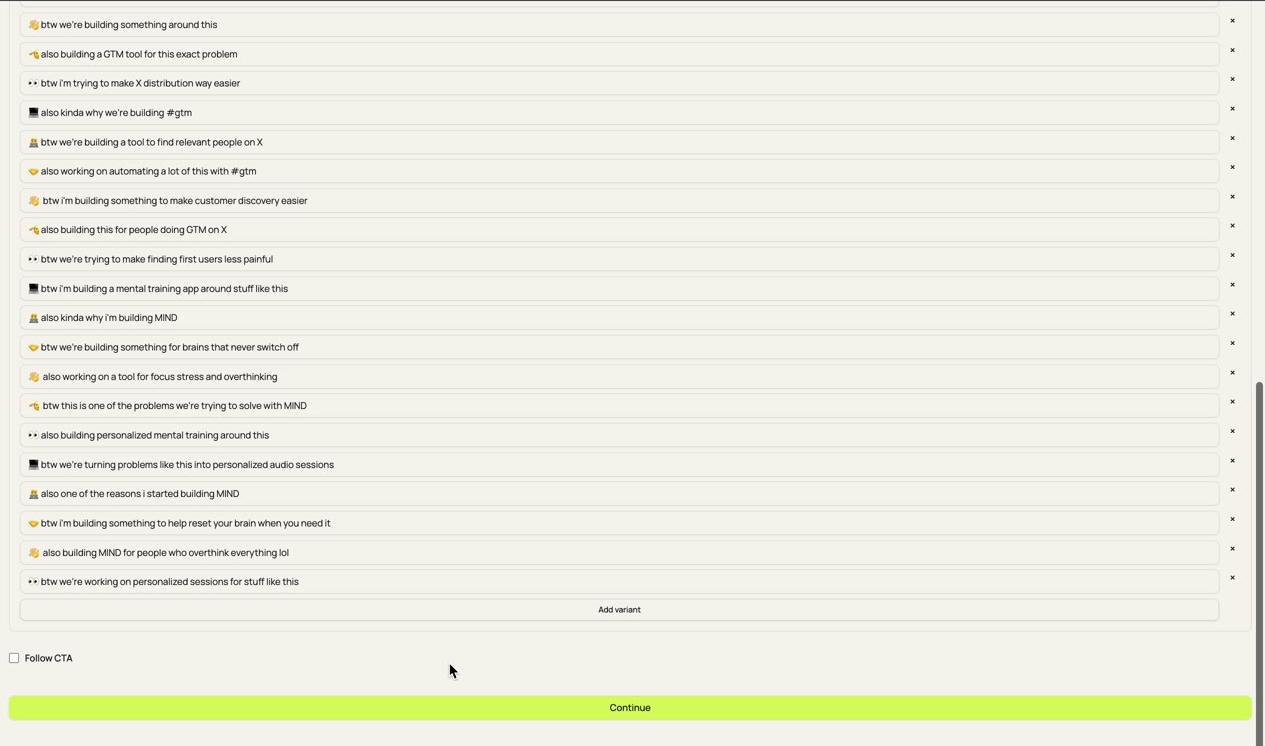
Follow CTA is separate from Product CTA. It is useful when you want to grow your X audience or personal brand, with natural prompts such as “Let's connect” or “Happy to connect.” Use it when growing the account is the goal; you do not have to use both CTA types.
Click Continue after reviewing your settings.
Choose Manual mode
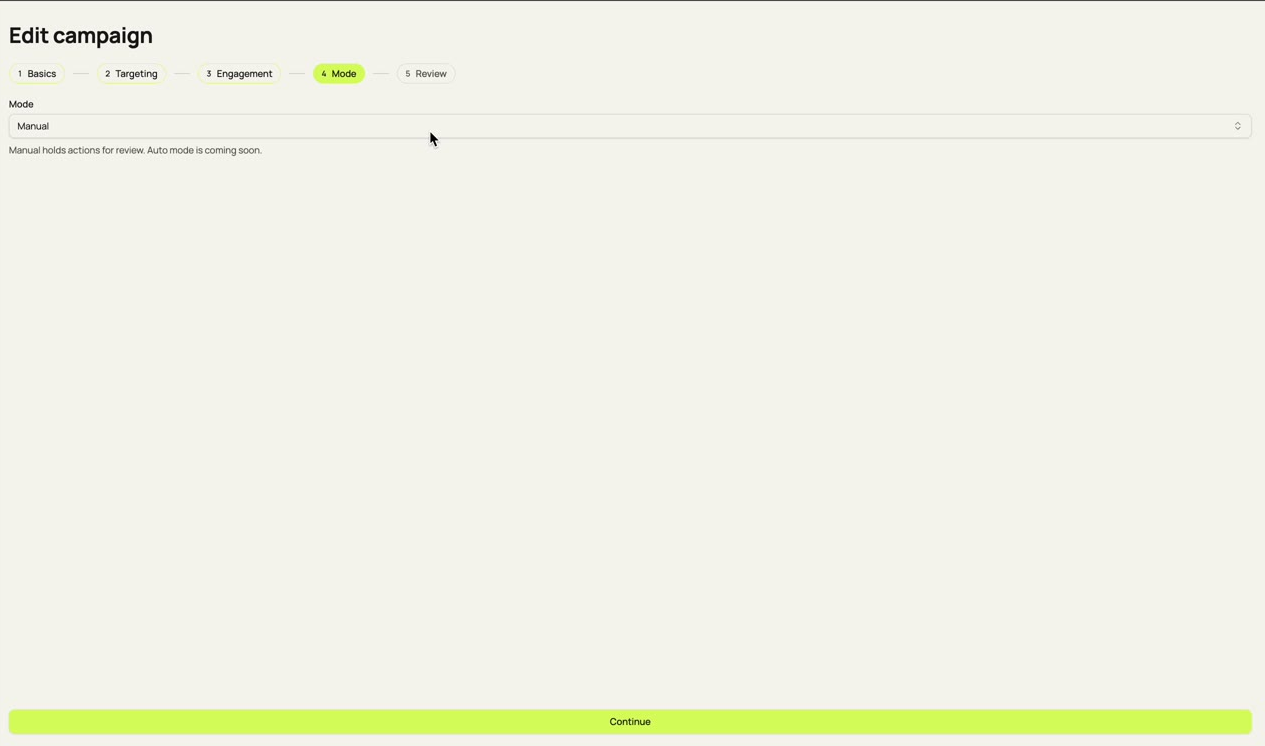
In Manual mode, #gtm prepares suggested actions and replies for you to review. You decide what to approve or skip. This is the currently available mode.
Auto mode is coming soon and is not part of the current setup. Click Continue.
Review and save
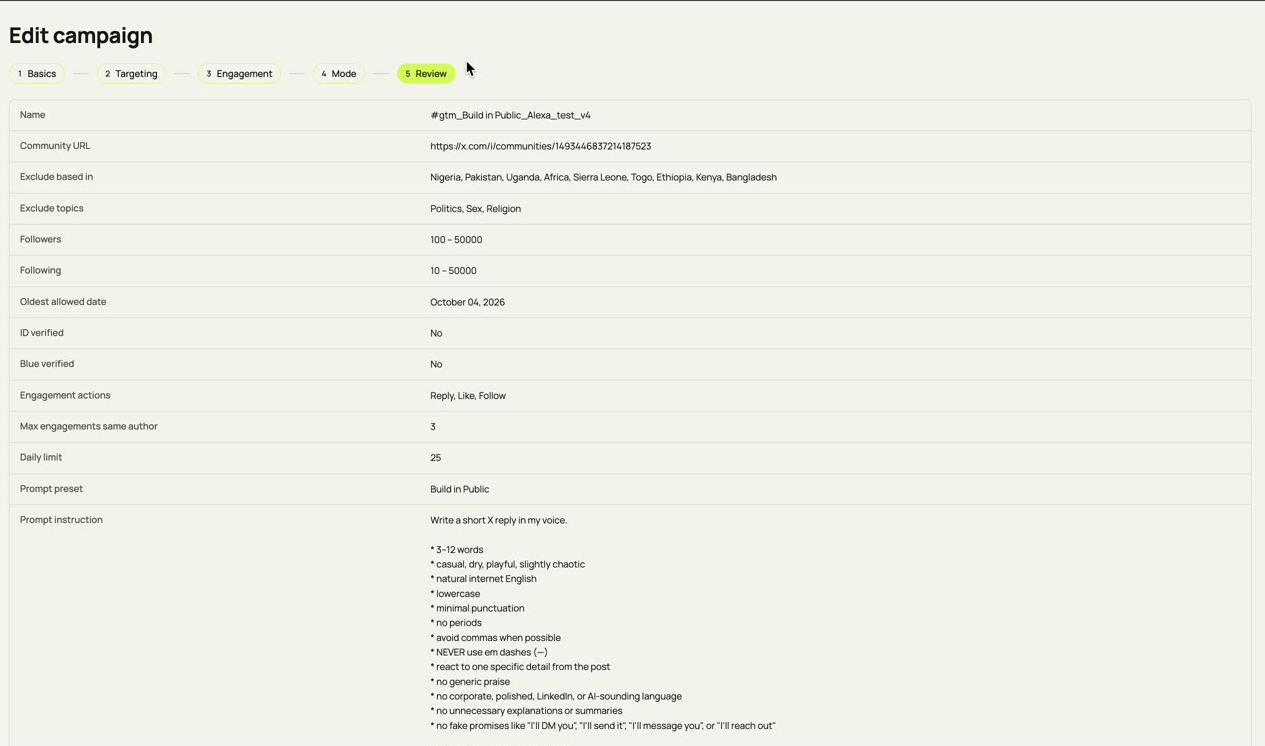
On the final Review screen, check your Community URL, targeting filters, actions and limits, reply instructions, CTA options, and mode. Return to a previous step if you need to make a change.
When everything looks right, click Save campaign.
After setup: your Review Queue
See what #gtm found and decide which suggested replies should proceed.
Return to Campaigns to find your saved campaign. Where the campaign list provides a Run control, use it to start the campaign. Then select Review Queue to see suggested posts and replies.
- 01
Read the source post
Check whether the conversation and the author are relevant.
- 02
Review or edit the reply
Adjust the proposed response if it doesn't sound like you.
- 03
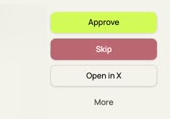
Approve or Skip
Approve actions you want to keep; Skip anything unsuitable.
- 04
Use extra controls
Open the post in X or use More for additional options.

The queue's progress metrics describe the displayed queue. They are not necessarily per-day totals. Approval is a review decision; execution timing depends on how the campaign processes approved actions.
Quick troubleshooting
Small changes can make a big difference to the suggestions you receive.
Not finding enough relevant posts?
Check the Community's Latest feed, widen the post-age window where appropriate, or relax overly restrictive filters. You can add separate campaigns for other active, relevant Communities.
Replies don't sound natural?
Update your Reply prompt instructions with your preferred style and examples. Remember that editing a shared preset may affect other campaigns.
One campaign uses too much of the allowance?
Reduce the campaign's Daily limit so you can distribute the available account capacity across multiple campaigns.
Need more detail?
Explore every targeting, engagement, and reply setting.